My first time designing and sewing my own custom-made fabric. Here's how it went →
How it started
My first film camera was a gift from my mom circa 2013, which launched many years of cataloguing my adolescence, high school escapades, travels on a college budget, and early adulthood. Most of this came to a halt in 2020, for obvious reasons—not much to photograph when you never leave the house!—but what began was a long journey in making: first it was face masks, then altered and upcycled clothes, then garments from scratch by following a pattern, then ___?
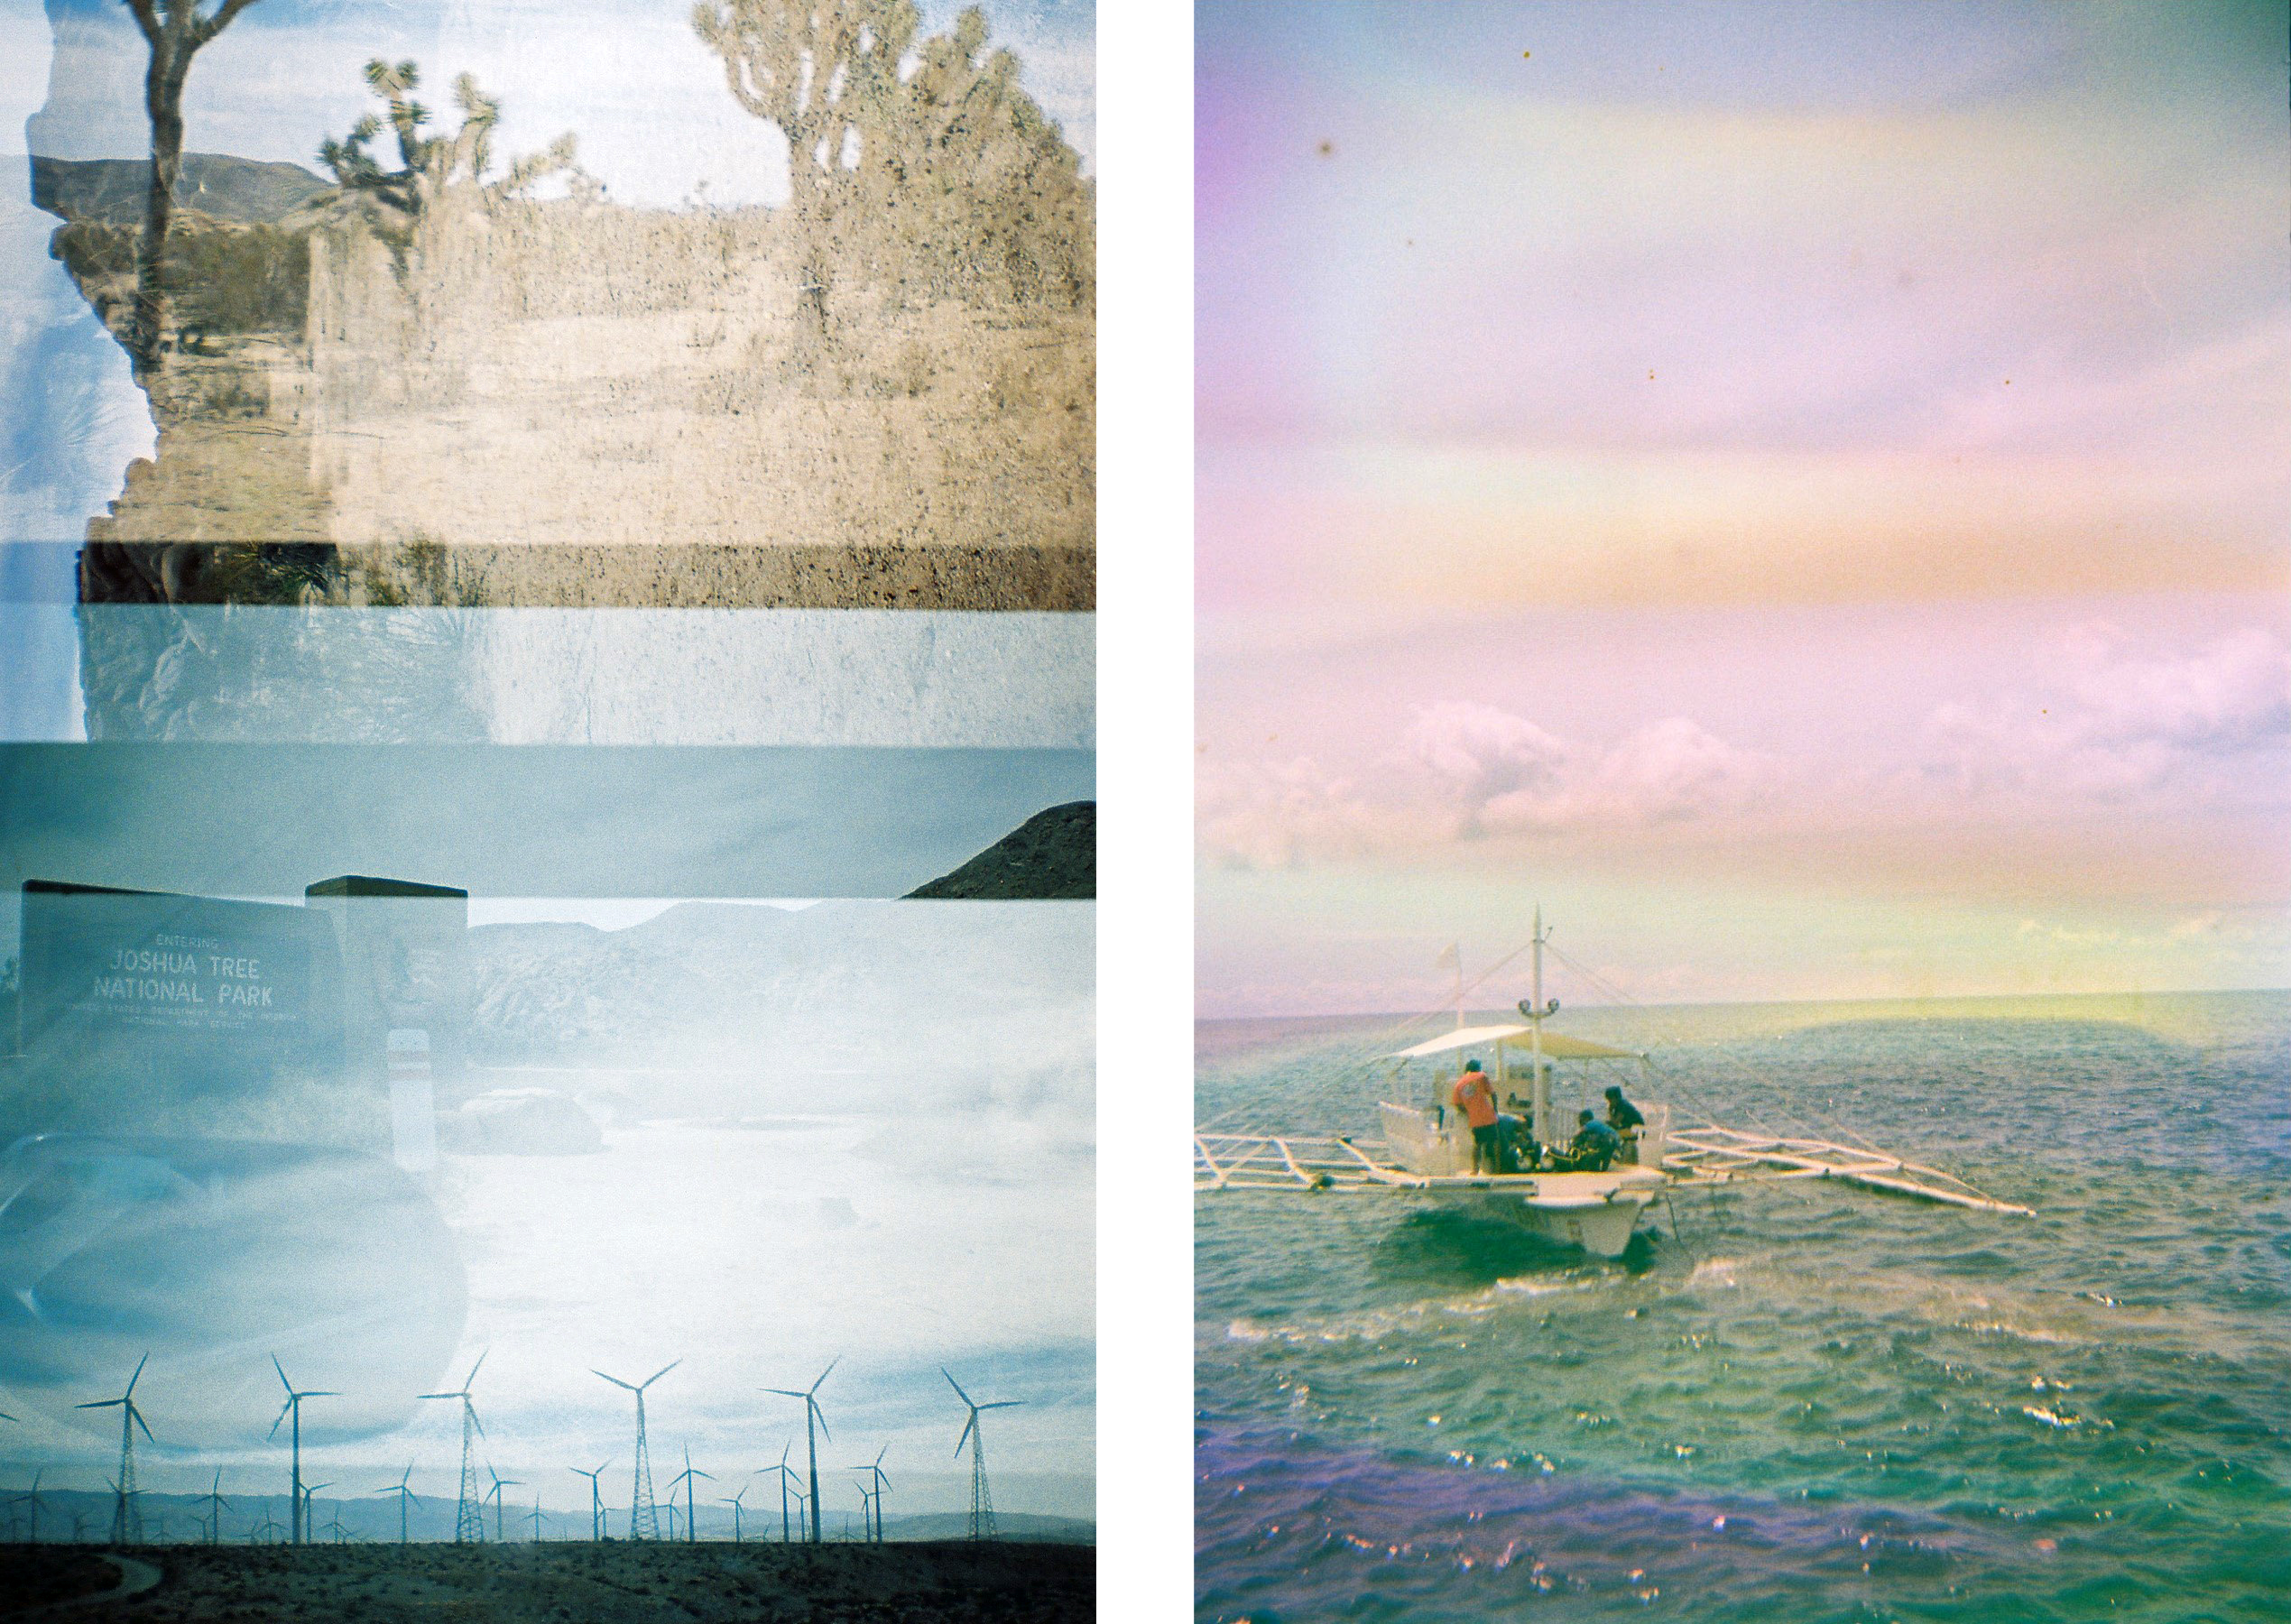 Happy accidents from my early photography days. Left: The California desert taken on my Diana Mini, which had this fun double exposure feature built in to it. Right: Off the coast of Mactan Island, Philippines, shortly before I dropped my camera in the salty ocean, which resulted in this wonderful rainbow effect.
Where it's going
I wrote about my goals/loose objectives for the new year in a previous post, and one of them was to complete a few projects focusing on a list of mysteriously unnamed techniques... one of which was to design and sew with my own fabric, created with scans of my aforementioned 35mm film photos. As I also wrote about, I've made quite a few big moves over the last two years, and I just miraculously re-found the USB drive with photos from the past 10+ years as well as the box of my negatives.
Up until a few months ago, I had always seen my photography and wearable art-making as distinct and separate disciplines... until I heard about a little service called Spoonflower. It's actually not little, but quite a large company, owned by its parent Shutterfly (you most likely know it for its print-on-demand paper products). Before it was acquired by Shutterfly, Spoonflower got its start in North Carolina converting inkjet printers to print on fabric out of an old sock factory. According to this feature on TechCrunch, co-founder Stephen Fraser credits the idea to his wife, Kim, who wanted new curtains but was unsatisfied with existing fabric designs on the market.
I had mostly known of Spoonflower as a marketplace for surface designers to offer their designs to be printed on demand, and for customers who want to purchase fabric or other textile home goods with designs from the marketplace. They currently have thirty types of fabric available for custom printing with a range of fiber content (maybe half are completely synthetic, some blends, and some 100% cellulosic) and weave/knit types (even the weird ones, like minky). Ordering fabric online is always a risk, let alone from a new-to-me supplier with mixed reviews on r/sewing, so I thought it best to order some samples before trying out a whole yard. (Spoiler: I didn't actually listen to my own advice and did order 1yd of something I was just really excited to make. That project is here!).
My process
1. The Images
I just started by picking out images I liked, whether I thought they would make for an interesting print on fabric or I really liked their colors and wanted to test the color reproduction of the images on fabric. I used a photo editor to create a canvas and start dragging in my favorite images and arranging them like a collage or a moodboard.
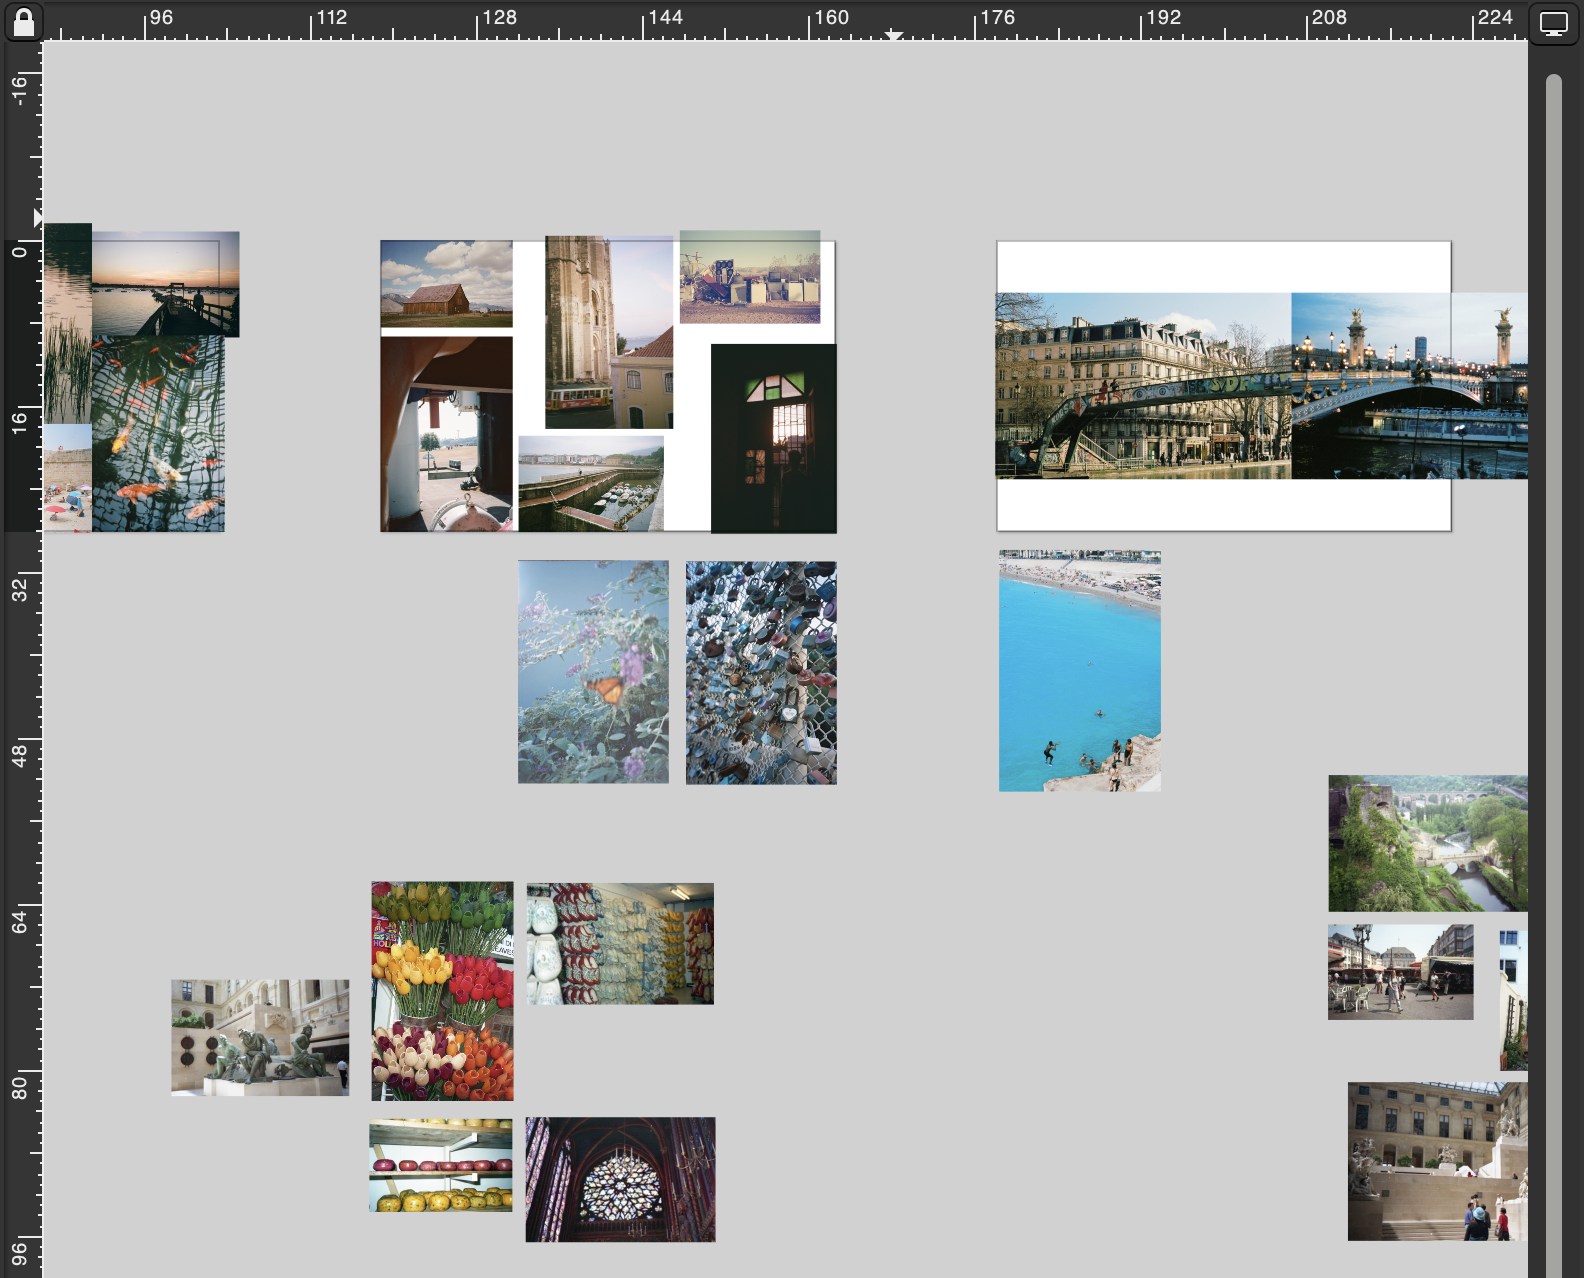 Example of some of my "moodboards," or photo groupings I thought looked cool
If you've never used a photo editor before, I highly recommend checking out this great tutorial posted by Spoonflower on how you can use free, open-source software to set up your images. You could also use it to follow along and fill in the gaps on steps I won't mention in detail here. As stated in the tutorial, you technically need to have decided on fabric before you can finalize your image, so for the the purposes of this step, I would just start by creating a blank file and playing around with different images.
2. The Fabric
Once I had a few images/compositions in mind, I went back to Spoonflower's list of fabrics and chose a few that I was interested in sampling. My criteria were
Fabrics I would already typically sew with and wear
Unique fabrics it would be interesting to see how photos would print on
Preferably natural fibers (what I typically wear anyway)
Anything I had in mind for a garment project already
Ultimately I decided to try the following:
Organic Cotton Knit (56" wide) — this has a natural (undyed) cotton base color, thought it would work well with the sepia-tone photos I took with some lomography film; think: dreamy and cozy t-shirts, secret pajamas
Organic Cotton Sateen (56" wide) — touted as having incredibly detailed print quality, I went for some photos with small figures and architectural details; think: crisp button ups, skirts or sleeves with pleat details
Cotton Spandex Jersey (60" wide) — I had a project in mind already that required a similar fabric and wanted to see how detailed this fabric could go; think: fitted tops and dresses with slits
Organic Sweet Pea Gauze (56" wide) — you rarely see prints on gauze! thought I would stress test the detail reproduction by choosing motifs with small details and repeats; think: airy summer layering pieces, maybe a swimsuit cover-up?
Dogwood Denim (56" wide) — I have to confess, I wasn't originally interested in the denim, then I found the chefs kiss perfect photo + project for it and decided to go all in on a full yard.
3. The Maths
The dreaded part: seeing if my photos were high resolution enough to print at scale. Spoonflower recommends a minimum of 150 PPI (pixels per inch), so the formula to calculate how large the image needs to be is
Some of my film scans are from the photo lab (varying dimensions but I usually don't splurge for the hi-res), and some are scans I did myself on my home scanner, from the Epson Perfection series. I didn't feel like re-scanning any negatives at this point, but wanted to see if I could just make it work with the ones I already had.
There were two ways for me to figure this out:
Start with the image(s) I wanted to print, assess their pixel dimensions, and see what dimensions in inches they would fill
Start with the fabric and dimensions I wanted printed, then create a digital canvas to that size and resolution, and pull in images to see how they compare.
I went with option (2), which is what Spoonflower also details in their tutorial. You will need to know the width of your chosen fabric as well as the dimensions you want to fill with it. I knew I wanted fat quarters, which is basically 1/2 the original fabric width x 1/2 yard (18"). Following the same steps in the tutorial, I set up a canvas with the dimensions in inches and 150 PPI for the resolution, which show you on screen how much of the fabric piece you can fill out. From there, you can continue to open as many images as you want and arrange them on the canvas.
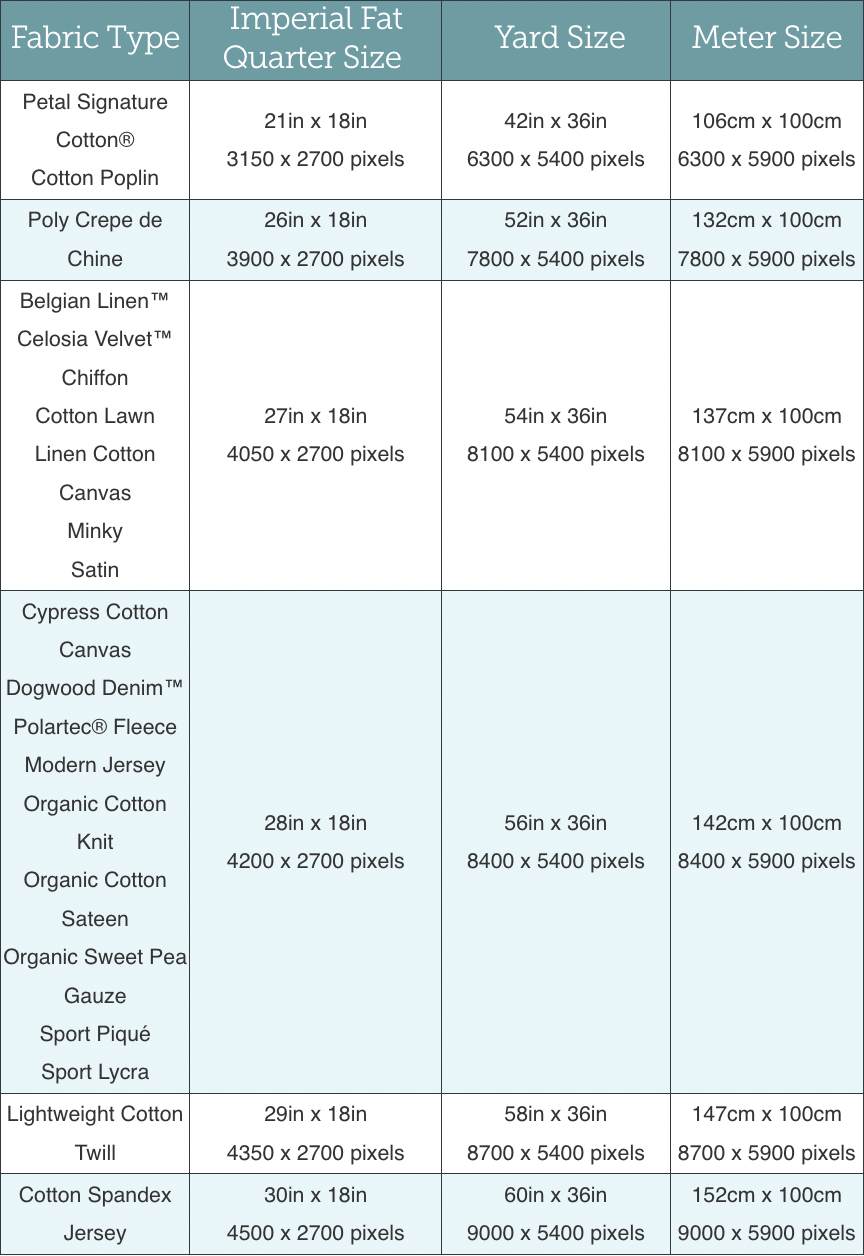 For some reason this image is no longer on the Help Center page, but it's a handy chart for finding the right width and pixel dimensions for any of the fabrics they sell.
Note: the images will appear exactly at the size within the fabric they should be printed at, according to the 150 PPI recommendation. If you scale the image up to fill a larger portion of the fabric, you're going to lose the original quality of the image when it's printed. I wanted to avoid that, so I chose multiple, smaller images for most of my canvases and used some at a larger size if the scans were large enough.
4. The Layout Editor
Once the file is exported as a JPEG, it's relatively straightforward to upload it to your "design library" and preview it in their handy editor. Ensuring the preview fabric and preview cut size are set to what you designed for, you shouldn't need to adjust anything else. In the case that your image size is smaller than the fabric cut size, you can choose from a variety of repeat options, which is neat. (The mirror option is ultimately how I chose to design the fabric I printed at a full yard on denim for this.) You can always scale down your image, but not make it any larger (since its PPI is already set to the largest you should go).
5. The Waiting Game
With my files prepared and orders in my shopping cart, I hit Purchase. Here's how long it took for me to get my orders in hand:
Jan 7th: Order placed
Jan 13th: The 4 fat quarters I ordered were shipped
Jan 14th: The 1yd I ordered was shipped
Jan 17th: The first package arrived
Jan 20th: The second package arrived
Based on their website, their printing facilities are currently in South Carolina and Arizona, and I'm based in Chicago, IL. Two weeks from ordering the fabric to it getting prewashed in my laundry machine is a pretty good turnaround, IMO.
6. The Actual Fabric (and my opinions on it)
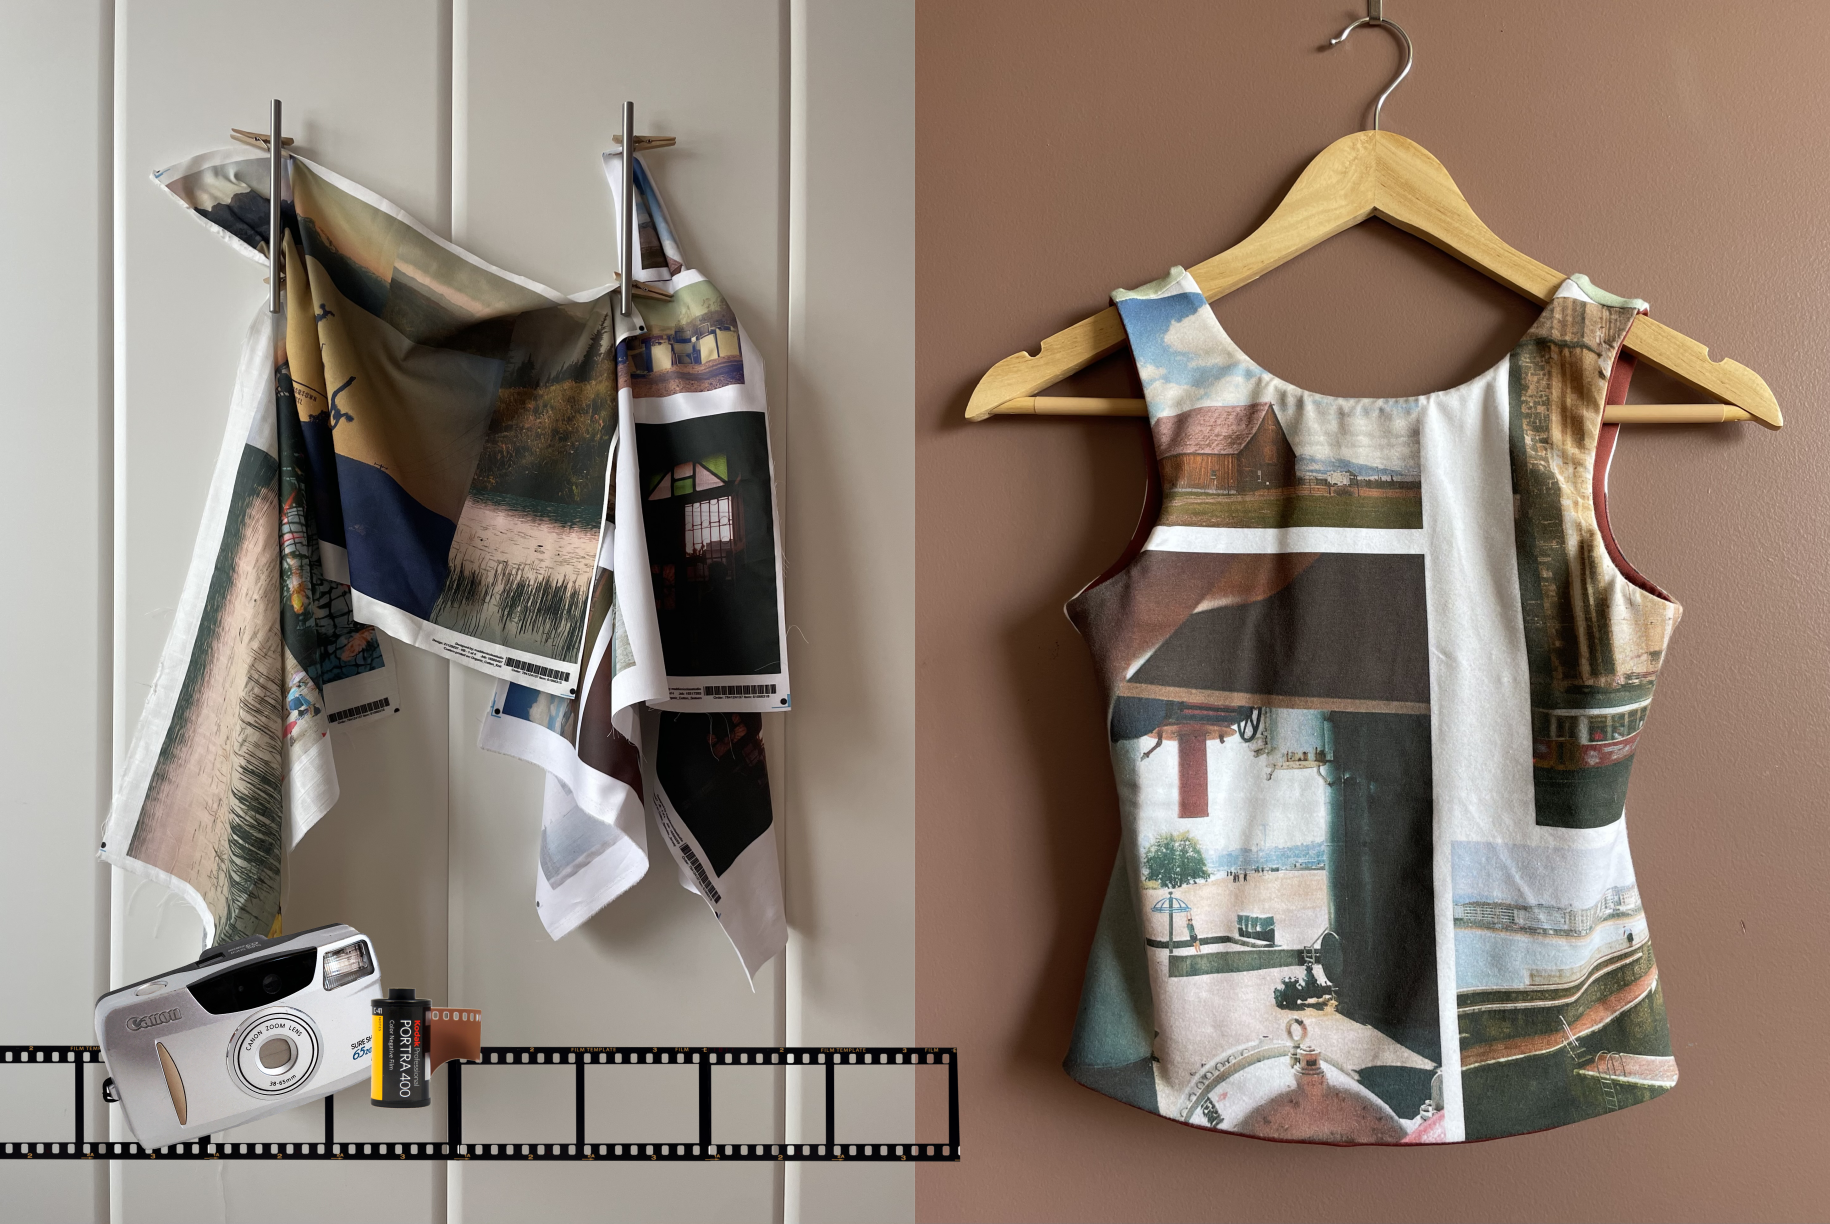
Here are some photos, pre-wash:
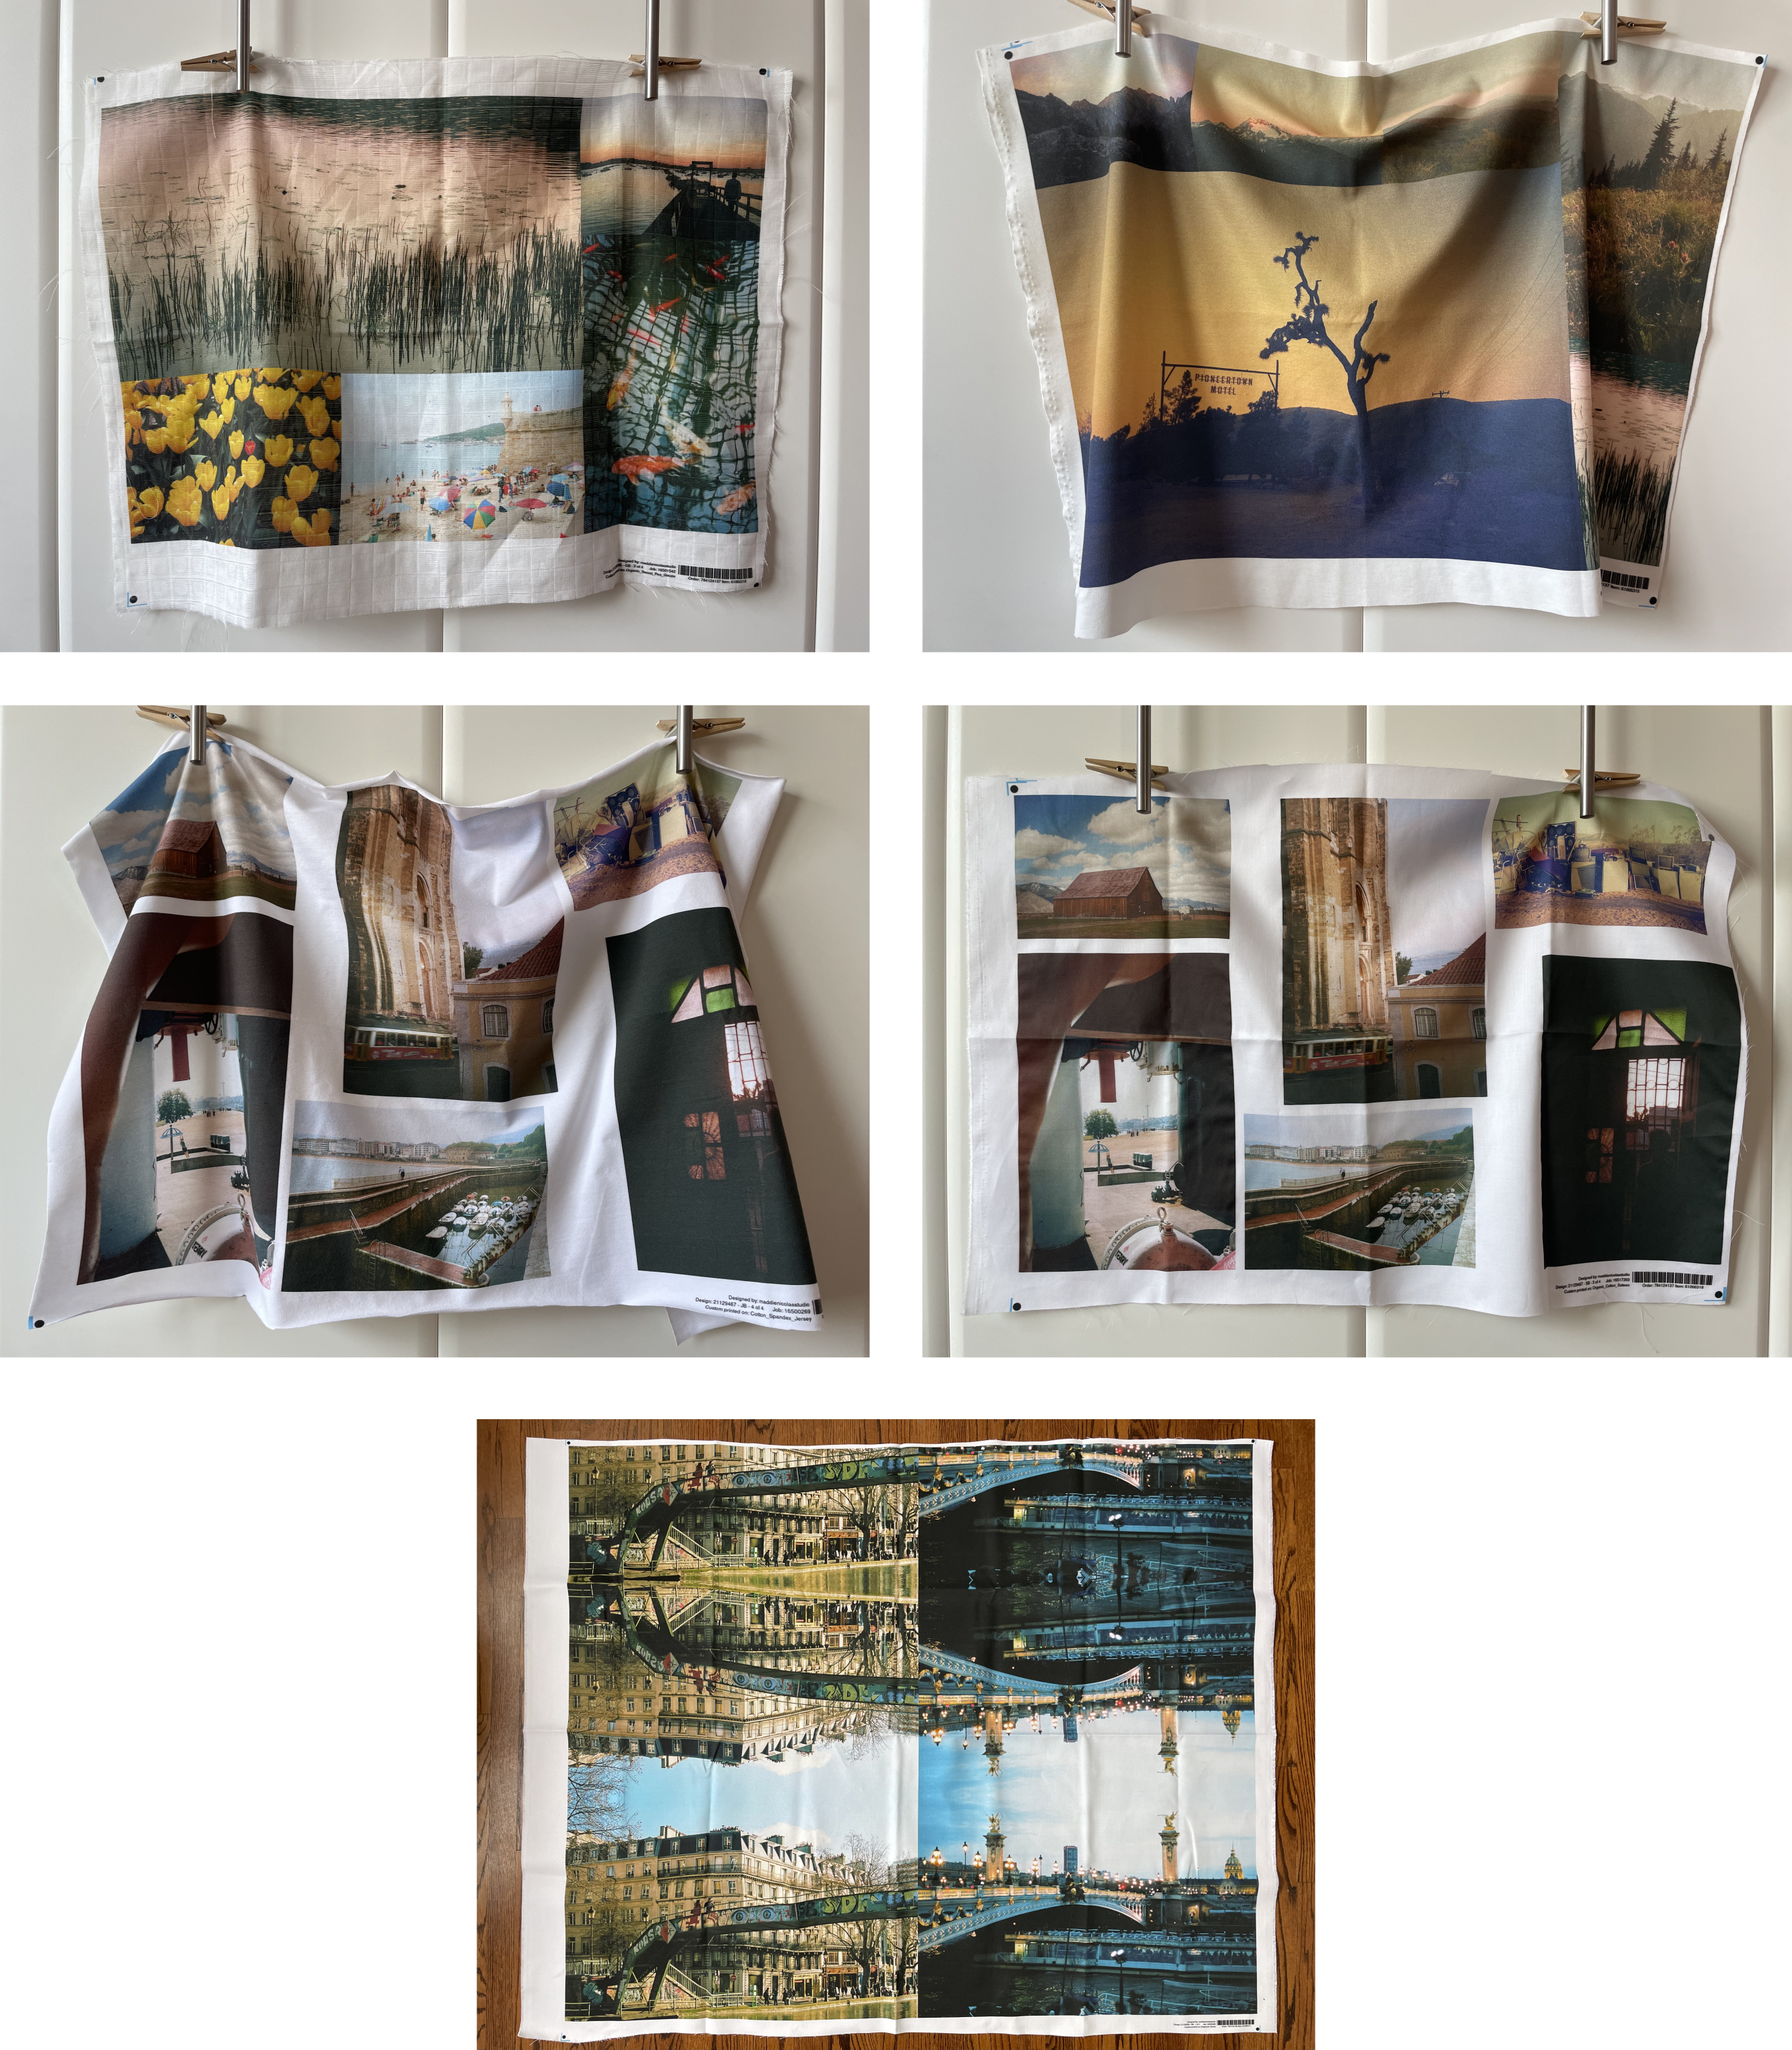 Left to right, top to bottom: gauze, cotton knit, cotton jersey spandex, cotton sateen, denim
After one wash (cold, delicates—always) and a hang dry, I'm pretty happy to report the colors and quality held up pretty much the same on all five types (you'd hope so). I can't really speak to (yet) how they will look after years and washing down the line, since I've only sewn three things with my samples and washed them somewhere between 1-4 times per garment.
It's worth noting that I ordered exclusively natural-fiber-based garments, which are printed with large format inkjet printers: just like those that print on nice photo paper, they precisely print tiiiiiny droplets of ink that sit on the surface of the material. Even screenprinting fabric works the same way, except screenprinting ink usually contains specialty binders and additives that "seep" into the fabric more. And those still fade over time. Spoonflower does say they use "water-based, non-toxic" pigment inks, so I'm guessing they maybe don't use as much of the extra solvents that are present in other fabric screenprinting inks.
If you order synthetic fabrics, those are printed using the sublimation method, which uses heat to convert solid ink into gas that bonds permanently with the polymers in synthetic fibers, so those prints will most likely never fade because they, well, won't disintegrate for a very, very long time. I think Spoonflower's options for performance/sport fabrics for swimwear or athletic wear look pretty solid, so I may try those out in the future.
A note on pricing
No, the fabric is not cheap. The most affordable fabric is their signature quilting cotton at $20/yard and their most expensive is the Belgian Linen, at a whopping $89/yard. The common fabrics for garment making fall in the $20-30/yard range with some fancy options like Essex Linen, a cotton-silk sateen, and sport lycra hitting above that.
In addition to the base fabric costs, I'm not sure what percentage the labor and equipment and ink costs make up of the price, but I'm guessing it's more than the fabric itself, in the case of the cheaper fabrics (less so in the case of the expensive fabrics). For the same price per yard, you can certainly buy much higher-quality fabrics than the base white fabric off the roll from Spoonflower, but what you're paying for is primarily the custom-printing service. Since $30/yard is usually my upper budget when it comes to buying fabric for my projects (and that would be for a special occasion...), I think it's only worth it for me for very intentionally planned, specific projects. Those will almost certainly include samples of the print on fabric as well, so it's important to factor that into the budget here too.
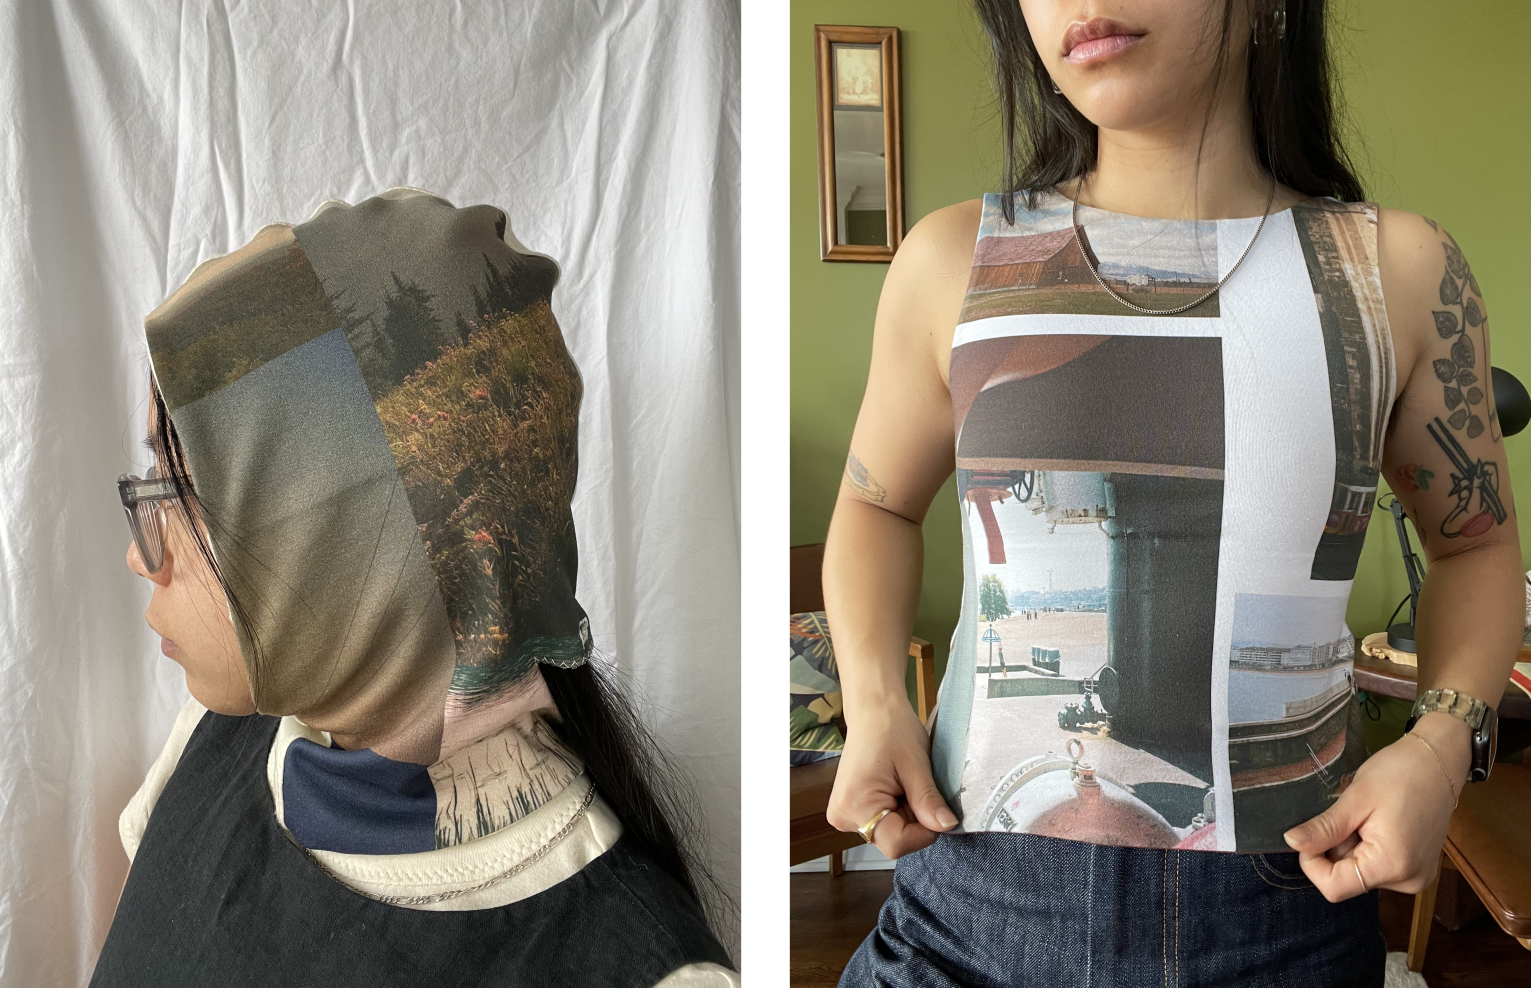
7. The Projects
Knowing that I mostly ordered fat quarters, I didn't really have anything in mind I could make with them (except the denim skirt I made out of 1yd that I've now cited for a third time). Turns out the knit pieces were just enough to squeeze out a piece of headwear (traced from a balaclava I already own), and a shortened version of the Titillating Tank pattern by Gracie Steel.
8. The Next Thing
As I noted above, the fabric isn't cheap, and ordering custom fabric certainly feels like an even deeper commitment (and sunken cost) than buying already produced fabric. So, I'm letting the ideas marinate while I work through some other projects. But, I will say, I have the bug! I love seeing my photos manipulated and recontextualized whether through the material properties, garment design and fit, or fabric placement.
I recently watched a video about a Japanese textile designer who said he loves seeing how his large-scale figurative prints will get transformed as the composition is cut up and shaped into a home decor item or clothing. I also recently met a designer in my city who creates unique and colorful prints intended to be worn as garments, an extension of one's bodily expression.
As a sewist whose fabric options are typically limited to what's in store or online (already milled and produced), I have been completely removed from the people who meticulously design the fabrics themselves (whether through yarn or weave choice, or what prints and variations and in what colors and at what scale—so many decisions I'm already overwhelmed). This felt like a watershed moment in terms of owning more of the design process behind the fabric itself, one of the critical ingredients that goes into making a quality garment. (I'd consider the other two ingredients garment design and technical construction skill, the triple-venn-diagram of which is now forming in my head and might be the subject of a future post...)
Just an update: while researching what other sewists think of Spoonflower on Reddit, I came across another fabric print-on-demand service called Raspberry Creek. They seem to offer a large range of fabrics as well, including things that Spoonflower doesn't offer (French Terry sounds particularly interesting!) so I may give that service a try in the future as well...
Other Resources
- A Guide to Shopping for Spoonflower Fabric by Seamwork
- This guide on the Spoonflower Help Center, Sizing Your Design, which I found the most helpful and relevant to sizing images